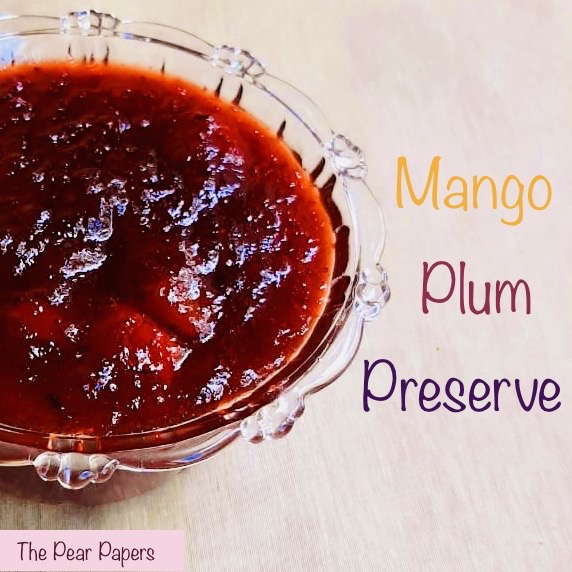
Mango Plum Preserve
I always love a good preserve. I’d lick it clean off of any plate. No shame.
Every supermarket section has a variety of jams/preserves but nothing beats the fresh home made ones. I don’t buy supermarket preserves anymore because it’s so easy to make them at home, especially in a healthy way – fresh fruit, no food colours, no artificial preservatives and no excessive sugar.
I’ve been experimenting with jams and jellies for a while now and I always try to make combinations we don’t usually see at the store. Here’s my latest creation – a Mango Plum Preserve. While the predominant flavours are mango and plum, I’ve added some gooseberry for a citrus kick and just a hint of bitterness. It also doesn’t hurt that gooseberries are packed with vitamin C and antioxidants! It really is quite an interesting and nutritious fruit, and it pairs really well with traditionally sweet flavours like mango.
So without further ado, here’s a super easy recipe for a Mango Plum Preserve that you can try the next time you have a hankering for something sweet and sour. It can be enjoyed in sandwiches, bread rolls, as an accompaniment for Indian breads like parathas and pooris and in lots of other ways!
Ingredients
Ripe mango – 1 medium sized or large
Plums (sweet) – 5
Gooseberry – 4 medium sized
Sugar – 250 gms
Salt – 1/4 tsp
Lemon/lime juice – 2 tbsp
Red chilly powder – 1 tsp (recommended, not necessary) (see note 2)
Yield
~750 to 850 gms
Prep time
30 mins
(to boil and cool the plums, chop the mango and grate the gooseberries)
Cook time
30 mins
Method
1) Wash all the fruits thoroughly. Grate the gooseberries. Peel the mango and roughly chop it.
2) In a wide pan boil the plums in water until the skin starts to peel off. Remove from water and set aside to cool slightly.
3) Once the plums cool a little, remove the seeds and transfer the pulp to a heavy bottomed pan. Add the chopped mango and the grated gooseberries. Gently mix these, making sure to retain the mango and plum chunks. Don’t over mash and make it gooey – the chunks are the best part!
4) Cook the fruits with sugar and salt and the chilly powder on medium to low heat for nearly 20 minutes, stirring constantly. Now reduce the heat to minimum and allow it to cook for a further 6 to 8 mins.
5) The preserve should have thickened and started to look glossy now. At this stage add the lemon juice and stir for a further 2 to 3 mins, keeping the heat at the lowest.
7) The preserve should now be the right consistency (if you’ve never made a jam/preserve before, check out the tips below!). Turn off the heat, remove the pan from the stove top and let it cool completely.
8) Transfer the preserve to a clean sterilised bottle and refrigerate. This mango plum preserve will stay fresh for 6 months when refrigerated correctly.
Notes
- I have used purple plums in this recipe, but any sweet variety of plum can be used. Sour ones will make the preserve too sour and you’d be forced to add extra sugar to balance the taste. The same goes for the mango. Avoid unripe or semi ripe mango as it will make your preserve too sour.
- The chilly powder is optional but I’m a big fan because it balances out the other flavours very well. It won’t make the preserve spicy or anything, it will just pack a very tiny punch. Oftentimes, store bought preserves are too sweet and can make you feel saturated when eating them. The chilly powder helps to reduce that feeling of saturation. Feel free to experiment with the quantity of chilli.
- The lemon juice added at the end serves three purposes: it gives an attractive gloss to the preserve, it acts as a natural preservative and it stops the sugar from crystallising after a few weeks of storage.
- This recipe is safe for children. In this case, you may choose to leave out the chilly powder.
- You can make any other fruity jam/preserve with the same technique. It’s just a matter of choosing the right fruit combinations so you maximise on natural sugar (instead of adding sugar separately) and tangy flavour. The sky is the limit!
Beginners tips
- So how can you tell if your preserve is ready to take off the stove? The right consistency is sometimes hard to gauge because the preserve will thicken after it has cooled down. Here’s a little trick to help you out:
– Take half a tsp of the preserve after step 6 and put it on a flat plate kept at room temperature. Leave it for about 10 secs. Then slowly tilt the plate and watch the preserve slide. If it separates (i.e., the liquid flows down faster than the solids) it’s not ready yet. Cook it a bit longer. If it slides down homogeneously, congratulations, you’ve nailed it. If it sticks to the plate and has trouble sliding down, you’ve gone too far.


You May Also Like

Appam
August 28, 2021
Kadalai Paruppu PoLi
April 10, 2023